<?xml version="1.0" encoding="utf-8"?><feed xmlns="http://www.w3.org/2005/Atom" ><generator uri="https://jekyllrb.com/" version="3.10.0">Jekyll</generator><link href="https://kb.pvoid.dev/feed.xml" rel="self" type="application/atom+xml" /><link href="https://kb.pvoid.dev/" rel="alternate" type="text/html" /><updated>2026-03-16T01:18:23+00:00</updated><id>https://kb.pvoid.dev/feed.xml</id><title type="html">Insert mode</title><subtitle>Snippets &amp; HOW TOs</subtitle><author><name>Felipe Rezende</name></author><entry><title type="html">Dump MySQL query to CSV</title><link href="https://kb.pvoid.dev/mysql/csv/2022/05/02/mysql-dump-query-csv.html" rel="alternate" type="text/html" title="Dump MySQL query to CSV" /><published>2022-05-02T03:00:00+00:00</published><updated>2022-05-02T03:00:00+00:00</updated><id>https://kb.pvoid.dev/mysql/csv/2022/05/02/mysql-dump-query-csv</id><content type="html" xml:base="https://kb.pvoid.dev/mysql/csv/2022/05/02/mysql-dump-query-csv.html"><![CDATA[<figure class="highlight"><pre><code class="language-bash" data-lang="bash">mysql <span class="nt">-e</span> <span class="s2">"select * from table;"</span> <span class="nt">-h</span> HOST <span class="nt">--port</span><span class="o">=</span>PORT <span class="nt">-u</span> USER <span class="nt">-p</span> DATABASE <span class="o">&gt;</span> mydumpfile.csv</code></pre></figure>]]></content><author><name>Felipe Rezende</name></author><category term="mysql" /><category term="csv" /><category term="mysql" /><category term="csv" /><summary type="html"><![CDATA[mysql -e "select * from table;" -h HOST --port=PORT -u USER -p DATABASE &gt; mydumpfile.csv]]></summary></entry><entry><title type="html">Flask vs Django</title><link href="https://kb.pvoid.dev/mysql/csv/2022/05/02/flask-vs-django.html" rel="alternate" type="text/html" title="Flask vs Django" /><published>2022-05-02T03:00:00+00:00</published><updated>2022-05-02T03:00:00+00:00</updated><id>https://kb.pvoid.dev/mysql/csv/2022/05/02/flask-vs-django</id><content type="html" xml:base="https://kb.pvoid.dev/mysql/csv/2022/05/02/flask-vs-django.html"><![CDATA[<h1 id="introduction">Introduction</h1>
<p>Flask and Django are two popular web development frameworks for Python. While they share many similarities, there are some key differences between the two that make them suitable for different use cases.</p>

<h1 id="flask">Flask</h1>
<p>First, let’s take a look at Flask. Flask is a microweb framework, which means it is a lightweight framework that provides only the essential features for web development. This makes Flask a good choice for developing small-scale applications or for building the backend of a web application. Flask is also known for its flexibility and simplicity, which makes it easy to learn and use.</p>

<h1 id="django">Django</h1>
<p>On the other hand, Django is a full-stack web framework. This means that it provides a complete set of tools and features for building a web application, from the frontend to the backend. This makes Django a good choice for developing large-scale, complex applications. Django is also known for its robustness and scalability, which makes it suitable for handling high traffic and large amounts of data.</p>

<h1 id="differences">Differences</h1>
<p>One key difference between Flask and Django is their approach to web development. Flask uses a minimalist approach, which means that it provides only the core features necessary for web development. This allows developers to have full control over the design and implementation of their applications. In contrast, Django follows a batteries-included approach, which means that it provides a wide range of built-in features and tools. This allows developers to get started quickly and easily, but it also means that they may have less control over the design and implementation of their applications.</p>

<p>Another key difference between Flask and Django is their use of templates. Flask uses Jinja2 as its default templating engine, which allows developers to define the structure of their HTML pages using Python code. This makes it easy to reuse code and to incorporate logic into the HTML pages. In contrast, Django uses its own templating engine, which is based on the Django template language. This templating engine provides a number of useful features, such as filters and tags, which make it easy to manipulate and display data in the HTML pages.</p>

<h1 id="conclusion">Conclusion</h1>
<p>In summary, Flask and Django are both powerful web development frameworks for Python. While they have many similarities, they also have some key differences that make them suitable for different use cases. Flask is a good choice for small-scale applications or for building the backend of a web application, while Django is a good choice for large-scale, complex applications.</p>]]></content><author><name>Felipe Rezende</name></author><category term="mysql" /><category term="csv" /><category term="django" /><summary type="html"><![CDATA[Introduction Flask and Django are two popular web development frameworks for Python. While they share many similarities, there are some key differences between the two that make them suitable for different use cases.]]></summary></entry><entry><title type="html">Django MySQL emoji support</title><link href="https://kb.pvoid.dev/django/mysql/emoji/2021/06/28/django-mysql-emoji.html" rel="alternate" type="text/html" title="Django MySQL emoji support" /><published>2021-06-28T03:00:00+00:00</published><updated>2021-06-28T03:00:00+00:00</updated><id>https://kb.pvoid.dev/django/mysql/emoji/2021/06/28/django-mysql-emoji</id><content type="html" xml:base="https://kb.pvoid.dev/django/mysql/emoji/2021/06/28/django-mysql-emoji.html"><![CDATA[<p>This post explains how to add emoji support to MySQL.</p>

<h2 id="introduction">Introduction</h2>
<p>In MySQL, the character set of a database, table, or column specifies the set of characters that can be stored in that database, table, or column. The collation of a database, table, or column specifies the rules for comparing and sorting the characters in a particular character set.</p>

<p>First, set charset to utf8mb4 and collate to utf8mb4_unicode_ci.</p>

<h2 id="charset">Charset</h2>

<figure class="highlight"><pre><code class="language-sql" data-lang="sql"><span class="nb">CHARACTER</span> <span class="k">SET</span> <span class="o">=</span> <span class="n">utf8mb4</span> <span class="k">COLLATE</span> <span class="o">=</span> <span class="n">utf8mb4_unicode_ci</span><span class="p">;</span></code></pre></figure>

<h2 id="database">Database</h2>

<figure class="highlight"><pre><code class="language-sql" data-lang="sql"><span class="k">ALTER</span> <span class="k">DATABASE</span> <span class="n">database_name</span> <span class="nb">CHARACTER</span> <span class="k">SET</span> <span class="o">=</span> <span class="n">utf8mb4</span> <span class="k">COLLATE</span> <span class="o">=</span> <span class="n">utf8mb4_unicode_ci</span><span class="p">;</span></code></pre></figure>

<h2 id="table">Table</h2>

<figure class="highlight"><pre><code class="language-sql" data-lang="sql"><span class="k">ALTER</span> <span class="k">TABLE</span> <span class="k">table_name</span> <span class="k">CONVERT</span> <span class="k">TO</span> <span class="nb">CHARACTER</span> <span class="k">SET</span> <span class="n">utf8mb4</span> <span class="k">COLLATE</span> <span class="n">utf8mb4_unicode_ci</span><span class="p">;</span></code></pre></figure>

<h2 id="column">Column</h2>

<figure class="highlight"><pre><code class="language-sql" data-lang="sql"><span class="k">ALTER</span> <span class="k">TABLE</span> <span class="k">table_name</span> <span class="k">MODIFY</span> <span class="k">COLUMN</span> <span class="n">col</span> <span class="nb">VARCHAR</span><span class="p">(</span><span class="mi">255</span><span class="p">)</span> <span class="nb">CHARACTER</span> <span class="k">SET</span> <span class="n">utf8mb4</span> <span class="k">COLLATE</span> <span class="n">utf8mb4_general_ci</span><span class="p">;</span>

<span class="k">ALTER</span> <span class="k">TABLE</span> <span class="k">table_name</span> <span class="k">MODIFY</span> <span class="k">COLUMN</span> <span class="n">col</span> <span class="nb">VARCHAR</span><span class="p">(</span><span class="mi">255</span><span class="p">)</span> <span class="nb">CHARACTER</span> <span class="k">SET</span> <span class="n">utf8mb4</span> <span class="k">COLLATE</span> <span class="n">utf8mb4_general_ci</span> <span class="k">NOT</span> <span class="k">NULL</span><span class="p">;</span>

<span class="k">ALTER</span> <span class="k">TABLE</span> <span class="k">table_name</span> <span class="k">MODIFY</span> <span class="k">COLUMN</span> <span class="n">col</span> <span class="nb">VARCHAR</span><span class="p">(</span><span class="mi">255</span><span class="p">)</span> <span class="nb">CHARACTER</span> <span class="k">SET</span> <span class="n">utf8mb4</span> <span class="k">COLLATE</span> <span class="n">utf8mb4_general_ci</span> <span class="k">DEFAULT</span> <span class="k">NULL</span><span class="p">;</span></code></pre></figure>

<h2 id="settingspy">settings.py</h2>
<p>Add charset to database options</p>

<figure class="highlight"><pre><code class="language-python" data-lang="python"><span class="n">DATABASES</span> <span class="o">=</span> <span class="p">{</span>
    <span class="s">'default'</span><span class="p">:</span> <span class="p">{</span>
        <span class="s">'ENGINE'</span><span class="p">:</span><span class="s">'django.db.backends.mysql'</span><span class="p">,</span>
        <span class="p">...</span>
        <span class="s">'OPTIONS'</span><span class="p">:</span> <span class="p">{</span><span class="s">'charset'</span><span class="p">:</span> <span class="s">'utf8mb4'</span><span class="p">},</span>
    <span class="p">}</span>
<span class="p">}</span></code></pre></figure>

<h2 id="conclusion">Conclusion</h2>

<p>UTF8MB4_UNICODE_CI is a character set and collation in MySQL. The character set specifies the set of characters that can be used in a MySQL database, while the collation specifies the rules for comparing and sorting the characters in a particular character set.</p>

<p>UTF8MB4 is a character set that uses the UTF-8 encoding, which is a variable-width encoding that can represent any Unicode character. This character set supports up to four-byte characters, which allows it to represent a wider range of characters than the standard UTF-8 character set.</p>

<p>UNICODE_CI is a collation that specifies a case-insensitive comparison for Unicode characters. This means that the characters will be compared and sorted without considering their case (upper or lower). For example, the strings “Hello” and “hello” would be considered equal using this collation.</p>

<p>In summary, UTF8MB4_UNICODE_CI is a character set and collation that allows you to store and compare Unicode characters in a MySQL database in a case-insensitive manner, using the UTF-8 encoding. This can be useful if you need to support a wide range of characters, including emojis, in your database.
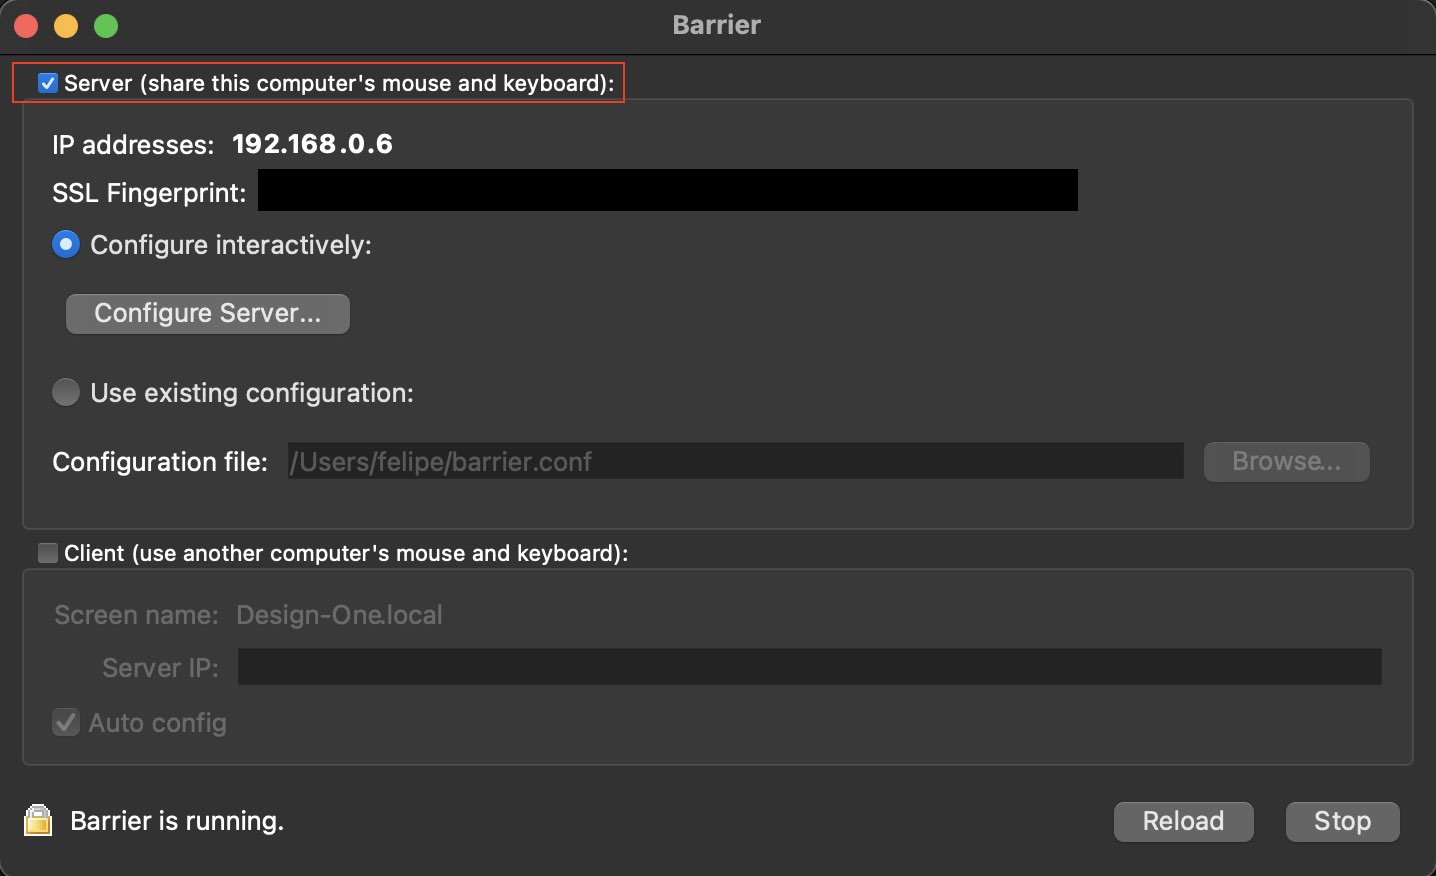
</p>

<p>Links:</p>
<ul>
  <li><a href="https://xxx-cook-book.gitbooks.io/django-cook-book/content/Databases/emoji-support.html">Django Cook Book</a></li>
</ul>]]></content><author><name>Felipe Rezende</name></author><category term="django" /><category term="mysql" /><category term="emoji" /><category term="django" /><category term="python" /><category term="mysql" /><summary type="html"><![CDATA[This post explains how to add emoji support to MySQL.]]></summary></entry><entry><title type="html">Barrier: control multiple computers with one keyboard mouse</title><link href="https://kb.pvoid.dev/kvm/keyboard/mouse/monitor/2020/11/04/barrier-kvm-switch.html" rel="alternate" type="text/html" title="Barrier: control multiple computers with one keyboard mouse" /><published>2020-11-04T03:00:00+00:00</published><updated>2020-11-04T03:00:00+00:00</updated><id>https://kb.pvoid.dev/kvm/keyboard/mouse/monitor/2020/11/04/barrier-kvm-switch</id><content type="html" xml:base="https://kb.pvoid.dev/kvm/keyboard/mouse/monitor/2020/11/04/barrier-kvm-switch.html"><![CDATA[<p><a href="https://github.com/debauchee/barrier">Barrier</a> is an open-source kvm software that allows you to control multiple computers with one
keyboard and mouse.</p>

<p>It mimics the functionality of a <a href="https://en.wikipedia.org/wiki/KVM_switch">KVM switch</a>, which historically would allow you to use a single keyboard and mouse
to control multiple computers by physically turning a dial on the box to switch the machine you’re controlling at any given moment.
Barrier does this in software.</p>

<h2 id="usage">Usage</h2>
<p>Install and run barrier on each machine that will be sharing. On the machine with the keyboard and mouse, make it the server.</p>

<figure class=""><img src="/imgs/barrier.jpg" alt="Barrier running on macOS as server." /><figcaption>
      Barrier running on macOS as server.

    </figcaption></figure>

<h2 id="os-support">OS support</h2>
<p>Barrier works on:</p>

<ul>
  <li>Windows 7, 8, 8.1, 10, and 11</li>
  <li>macOS</li>
  <li>Linux</li>
  <li>FreeBSD</li>
  <li>OpenBSD</li>
</ul>

<h2 id="installing-on-macos">Installing on macOS</h2>
<p>On macOS you can install it using <a href="https://brew.sh/">brew</a>.</p>

<figure class="highlight"><pre><code class="language-shell" data-lang="shell"><span class="nv">$ </span>brew cask <span class="nb">install </span>barrier</code></pre></figure>

<h2 id="installing-on-archmanjaro-linux">Installing on Arch/Manjaro Linux</h2>
<p>On Arch Linux you can install it using pacman.</p>

<figure class="highlight"><pre><code class="language-shell" data-lang="shell"><span class="nv">$ </span>pacman <span class="nt">-S</span> barrier</code></pre></figure>

<h2 id="links">Links</h2>
<ul>
  <li><a href="https://formulae.brew.sh/cask/barrier">Barrier on Homebrew</a></li>
  <li><a href="https://github.com/debauchee/barrier">Barrier on Github</a></li>
</ul>]]></content><author><name>Felipe Rezende</name></author><category term="kvm" /><category term="keyboard" /><category term="mouse" /><category term="monitor" /><category term="mac os" /><category term="linux" /><summary type="html"><![CDATA[Barrier is an open-source kvm software that allows you to control multiple computers with one keyboard and mouse.]]></summary></entry><entry><title type="html">Removing files older than 30 days</title><link href="https://kb.pvoid.dev/linux/shell/2020/09/29/linux-removing-files-older-than-x-days.html" rel="alternate" type="text/html" title="Removing files older than 30 days" /><published>2020-09-29T03:00:00+00:00</published><updated>2020-09-29T03:00:00+00:00</updated><id>https://kb.pvoid.dev/linux/shell/2020/09/29/linux-removing-files-older-than-x-days</id><content type="html" xml:base="https://kb.pvoid.dev/linux/shell/2020/09/29/linux-removing-files-older-than-x-days.html"><![CDATA[<figure class="highlight"><pre><code class="language-shell" data-lang="shell">find /path/to/ <span class="nt">-type</span> f <span class="nt">-mtime</span> +30 <span class="nt">-name</span> <span class="s1">'*.mp4'</span> <span class="nt">-execdir</span> <span class="nb">rm</span> <span class="nt">--</span> <span class="s1">'{}'</span> <span class="se">\;</span></code></pre></figure>

<ul>
  <li>
    <p>find: the unix command for finding files/directories/links and etc.</p>
  </li>
  <li>
    <p>/path/to/: the directory to start your search in.</p>
  </li>
  <li>
    <p>-type f: only find files.</p>
  </li>
  <li>
    <p>-name ‘*.mp4’: list files that ends with .mp4.</p>
  </li>
  <li>
    <p>-mtime +30: only consider the ones with modification time older than 30 days.</p>
  </li>
  <li>
    <p>-execdir … \;: for each such result found, do the following command in ….</p>
  </li>
  <li>
    <p>rm – ‘{}’: remove the file; the {} part is where the find result gets substituted into from the previous part.</p>
  </li>
</ul>]]></content><author><name>Felipe Rezende</name></author><category term="linux" /><category term="shell" /><category term="shell" /><summary type="html"><![CDATA[find /path/to/ -type f -mtime +30 -name '*.mp4' -execdir rm -- '{}' \;]]></summary></entry><entry><title type="html">Python: Creating a virtual environment</title><link href="https://kb.pvoid.dev/python/venv/2020/07/16/virtual-environment-python.html" rel="alternate" type="text/html" title="Python: Creating a virtual environment" /><published>2020-07-16T03:00:00+00:00</published><updated>2020-07-16T03:00:00+00:00</updated><id>https://kb.pvoid.dev/python/venv/2020/07/16/virtual-environment-python</id><content type="html" xml:base="https://kb.pvoid.dev/python/venv/2020/07/16/virtual-environment-python.html"><![CDATA[<p>virtualenv is used to manage Python packages for different projects. Using virtualenv allows you to avoid installing Python packages globally which could break system tools or other projects. You can install virtualenv using pip.</p>

<p>Note: If you are using Python 3.3 or newer, the venv module is the preferred way to create and manage virtual environments. venv is included in the Python standard library and requires no additional installation.</p>

<h1 id="installing-virtualenv">Installing virtualenv</h1>

<figure class="highlight"><pre><code class="language-shell" data-lang="shell">python3 <span class="nt">-m</span> pip <span class="nb">install</span> <span class="nt">--user</span> virtualenv</code></pre></figure>

<h1 id="creating-a-virtual-environment">Creating a virtual environment</h1>

<figure class="highlight"><pre><code class="language-shell" data-lang="shell">python3 <span class="nt">-m</span> venv <span class="nb">env</span></code></pre></figure>

<h1 id="activating-a-virtual-environment">Activating a virtual environment</h1>

<figure class="highlight"><pre><code class="language-shell" data-lang="shell"><span class="nb">source env</span>/bin/activate</code></pre></figure>

<h1 id="install-packages">Install packages</h1>

<figure class="highlight"><pre><code class="language-shell" data-lang="shell">pip <span class="nb">install</span> <span class="nt">-r</span> requirements.txt</code></pre></figure>

<h1 id="freeze-requirements">Freeze requirements</h1>

<figure class="highlight"><pre><code class="language-shell" data-lang="shell">pip freeze <span class="o">&gt;</span> requirements.txt</code></pre></figure>

<h1 id="leaving-the-virtual-environment">Leaving the virtual environment</h1>

<figure class="highlight"><pre><code class="language-shell" data-lang="shell">deactivate</code></pre></figure>

<p>Reference:</p>
<ul>
  <li><a href="https://packaging.python.org/guides/installing-using-pip-and-virtual-environments/">python.org</a></li>
</ul>]]></content><author><name>Felipe Rezende</name></author><category term="python" /><category term="venv" /><category term="python" /><summary type="html"><![CDATA[virtualenv is used to manage Python packages for different projects. Using virtualenv allows you to avoid installing Python packages globally which could break system tools or other projects. You can install virtualenv using pip.]]></summary></entry><entry><title type="html">How do I redirect HTTP traffic to HTTPS on Apache</title><link href="https://kb.pvoid.dev/apache/http/2020/07/13/redirect-http-traffic-to-https.html" rel="alternate" type="text/html" title="How do I redirect HTTP traffic to HTTPS on Apache" /><published>2020-07-13T21:00:00+00:00</published><updated>2020-07-13T21:00:00+00:00</updated><id>https://kb.pvoid.dev/apache/http/2020/07/13/redirect-http-traffic-to-https</id><content type="html" xml:base="https://kb.pvoid.dev/apache/http/2020/07/13/redirect-http-traffic-to-https.html"><![CDATA[<p>Open your Apache configuration file. Possible locations include /etc/httpd/conf/httpd.conf (Apache 2/httpd), /etc/apache2/sites-enabled/ (Apache 2.4), or /etc/apache2/apache2.conf (Apache on Ubuntu).</p>

<p>Add a rewrite rule to the VirtualHost section of your configuration file similar to the following:</p>

<figure class="highlight"><pre><code class="language-apache" data-lang="apache"><span class="p">&lt;</span><span class="nl">VirtualHost</span><span class="sr"> *:80</span><span class="p">&gt;
</span>    <span class="nc">RewriteEngine</span> <span class="ss">On</span>
    <span class="nc">RewriteCond</span> %{HTTP:X-Forwarded-Proto} =http
    <span class="nc">RewriteRule</span> .* https://%{HTTP:Host}%{REQUEST_URI} [L,R=permanent]
<span class="p">&lt;/</span><span class="nl">VirtualHost</span><span class="p">&gt;</span></code></pre></figure>

<p>Save your Apache configuration file.</p>

<p>Restart Apache.</p>

<p>Reference:</p>
<ul>
  <li><a href="https://aws.amazon.com/premiumsupport/knowledge-center/redirect-http-https-elb/">AWS</a></li>
</ul>]]></content><author><name>Felipe Rezende</name></author><category term="apache" /><category term="http" /><category term="apache" /><category term="linux" /><summary type="html"><![CDATA[Open your Apache configuration file. Possible locations include /etc/httpd/conf/httpd.conf (Apache 2/httpd), /etc/apache2/sites-enabled/ (Apache 2.4), or /etc/apache2/apache2.conf (Apache on Ubuntu).]]></summary></entry><entry><title type="html">Installing ffmpeg on EC2</title><link href="https://kb.pvoid.dev/ffmpeg/ec2/2020/07/07/ffmpeg-on-ec2.html" rel="alternate" type="text/html" title="Installing ffmpeg on EC2" /><published>2020-07-07T21:00:00+00:00</published><updated>2020-07-07T21:00:00+00:00</updated><id>https://kb.pvoid.dev/ffmpeg/ec2/2020/07/07/ffmpeg-on-ec2</id><content type="html" xml:base="https://kb.pvoid.dev/ffmpeg/ec2/2020/07/07/ffmpeg-on-ec2.html"><![CDATA[<p>This article explains how to install ffmpeg on a EC2 instance.</p>

<h1 id="setup">Setup</h1>
<p>SSH into your instance and become root</p>

<figure class="highlight"><pre><code class="language-shell" data-lang="shell"><span class="nv">$ </span><span class="nb">sudo </span>su -</code></pre></figure>

<p>Go to the the /usr/local/bin directory</p>

<figure class="highlight"><pre><code class="language-shell" data-lang="shell"><span class="nv">$ </span><span class="nb">cd</span> /usr/local/bin</code></pre></figure>

<p>Inside the /usr/local/bin directory, create an “ffmpeg” directory</p>

<figure class="highlight"><pre><code class="language-shell" data-lang="shell"><span class="nv">$ </span><span class="nb">mkdir </span>ffmpeg</code></pre></figure>

<p>Go into the new directory</p>

<figure class="highlight"><pre><code class="language-shell" data-lang="shell"><span class="nv">$ </span><span class="nb">cd </span>ffmpeg</code></pre></figure>

<p>Go to static build directory at http://ffmpeg.gusari.org/static/64bit/ and pick the latest version of FFMPEG.</p>

<figure class="highlight"><pre><code class="language-shell" data-lang="shell"><span class="nv">$ </span>wget https://johnvansickle.com/ffmpeg/releases/ffmpeg-release-amd64-static.tar.xz</code></pre></figure>

<p>The file should now be in /usr/local/bin/ffmpeg. Untar it…</p>

<figure class="highlight"><pre><code class="language-shell" data-lang="shell"><span class="nv">$ </span><span class="nb">tar</span> <span class="nt">-xf</span> ffmpeg-release-amd64-static.tar.xz</code></pre></figure>

<p>Move files</p>

<figure class="highlight"><pre><code class="language-shell" data-lang="shell"><span class="nv">$ </span><span class="nb">mv </span>ffmpeg-release-amd64-static/<span class="k">*</span> .</code></pre></figure>

<p>If you want to be able to execute FFMPEG from any directory, simply create a symlink into /usr/bin like this:</p>

<figure class="highlight"><pre><code class="language-shell" data-lang="shell"><span class="nv">$ </span><span class="nb">ln</span> <span class="nt">-s</span> /usr/local/bin/ffmpeg/ffmpeg /usr/bin/ffmpeg</code></pre></figure>

<p>Now, you should be able to run the command “ffmpeg” from anywhere</p>

<h1 id="reference">Reference</h1>
<ul>
  <li><a href="https://forums.aws.amazon.com/thread.jspa?messageID=332091">nbcnc on AWS Forums</a></li>
  <li><a href="https://medium.com/@maskaravivek/how-to-install-ffmpeg-on-ec2-running-amazon-linux-451e4a8e2694">Vivek Maskara on Medium</a></li>
</ul>]]></content><author><name>Felipe Rezende</name></author><category term="ffmpeg" /><category term="ec2" /><category term="ec2" /><category term="linux" /><category term="ffmpeg" /><summary type="html"><![CDATA[This article explains how to install ffmpeg on a EC2 instance.]]></summary></entry><entry><title type="html">How to set Android TextView line spacing?</title><link href="https://kb.pvoid.dev/android/sdk/textview/line/spacing/2020/04/27/android-textview-linespacing.html" rel="alternate" type="text/html" title="How to set Android TextView line spacing?" /><published>2020-04-27T21:00:00+00:00</published><updated>2020-04-27T21:00:00+00:00</updated><id>https://kb.pvoid.dev/android/sdk/textview/line/spacing/2020/04/27/android-textview-linespacing</id><content type="html" xml:base="https://kb.pvoid.dev/android/sdk/textview/line/spacing/2020/04/27/android-textview-linespacing.html"><![CDATA[<p>You can use <strong>lineSpacingExtra</strong> or <strong>lineSpacingMultiplier</strong> in your XML file.</p>

<h2 id="example">Example:</h2>

<figure class="highlight"><pre><code class="language-xml" data-lang="xml"><span class="nt">&lt;TextView</span>
    <span class="na">android:layout_width=</span><span class="s">"wrap_content"</span>
    <span class="na">android:layout_height=</span><span class="s">"wrap_content"</span>
    <span class="na">android:lineSpacingMultiplier=</span><span class="s">"0.7"</span><span class="nt">&gt;</span></code></pre></figure>

<p>More on <a href="https://stackoverflow.com/questions/6863974/android-textview-padding-between-lines">stackoverflow</a>.</p>]]></content><author><name>Felipe Rezende</name></author><category term="android" /><category term="sdk" /><category term="textview" /><category term="line" /><category term="spacing" /><category term="android" /><summary type="html"><![CDATA[You can use lineSpacingExtra or lineSpacingMultiplier in your XML file.]]></summary></entry><entry><title type="html">Ntfs Mountain Lion English</title><link href="https://kb.pvoid.dev/lessons/2013/02/28/NTFS-Mountain-Lion-English.html" rel="alternate" type="text/html" title="Ntfs Mountain Lion English" /><published>2013-02-28T00:00:00+00:00</published><updated>2013-02-28T00:00:00+00:00</updated><id>https://kb.pvoid.dev/lessons/2013/02/28/NTFS-Mountain-Lion-English</id><content type="html" xml:base="https://kb.pvoid.dev/lessons/2013/02/28/NTFS-Mountain-Lion-English.html"><![CDATA[<p>HOW TO: NFTS Read and write on Lion/Mountain Lion</p>

<ol>
  <li>
    <p>install brew package manager. <a href="http://mxcl.github.com/homebrew/">http://mxcl.github.com/homebrew/</a></p>
  </li>
  <li>
    <p>install the following packages.</p>
  </li>
</ol>

<figure class="highlight"><pre><code class="language-shell" data-lang="shell"><span class="nv">$ </span>brew <span class="nb">install </span>fuse4x
<span class="nv">$ </span>brew <span class="nb">install </span>ntfs-3g</code></pre></figure>

<ol>
  <li>copy the following file and set permissions.</li>
</ol>

<figure class="highlight"><pre><code class="language-shell" data-lang="shell"><span class="nv">$ </span><span class="nb">sudo cp</span> <span class="nt">-rfX</span> /usr/local/Cellar/fuse4x-kext/0.8.14/Library/Extensions/fuse4x.kext /System/Library/Extensions
<span class="nv">$ </span><span class="nb">sudo chmod</span> +s /System/Library/Extensions/fuse4x.kext/Support/load_fuse4x</code></pre></figure>

<ol>
  <li>backup the mount script.</li>
</ol>

<figure class="highlight"><pre><code class="language-shell" data-lang="shell"><span class="nv">$ </span><span class="nb">sudo mv</span> /sbin/mount_ntfs /sbin/mount_ntfs.orig</code></pre></figure>

<ol>
  <li>create a new mount script and set permissions.</li>
</ol>

<figure class="highlight"><pre><code class="language-shell" data-lang="shell"><span class="nv">$ </span><span class="nb">sudo touch</span> /sbin/mount_ntfs
<span class="nv">$ </span><span class="nb">sudo chmod </span>0755 /sbin/mount_ntfs
<span class="nv">$ </span><span class="nb">sudo chown </span>0:0 /sbin/mount_ntfs
<span class="nv">$ </span><span class="nb">sudo </span>nano /sbin/mount_ntfs</code></pre></figure>

<ol>
  <li>mount script content.</li>
</ol>

<figure class="highlight"><pre><code class="language-shell" data-lang="shell"><span class="c">#!/bin/bash</span>

<span class="nv">VOLUME_NAME</span><span class="o">=</span><span class="s2">"</span><span class="k">${</span><span class="p">@</span>:<span class="nv">$#}</span><span class="s2">"
VOLUME_NAME=</span><span class="k">${</span><span class="nv">VOLUME_NAME</span><span class="p">#/Volumes/</span><span class="k">}</span><span class="s2">
USER_ID=501
GROUP_ID=20
TIMEOUT=20

if [ </span><span class="sb">`</span>/usr/bin/stat <span class="nt">-f</span> <span class="s2">"%u"</span> /dev/console<span class="sb">`</span><span class="s2"> -eq 0 ]; then
        USERNAME=</span><span class="sb">`</span>/usr/bin/defaults <span class="nb">read</span> /library/preferences/com.apple.loginwindow | /usr/bin/grep autoLoginUser | /usr/bin/awk <span class="s1">'{ print $3 }'</span> | /usr/bin/sed <span class="s1">'s/;//'</span><span class="sb">`</span><span class="s2">
        if [ "</span><span class="nv">$USERNAME</span><span class="s2">" = "" ]; then
                until [ </span><span class="sb">`</span><span class="nb">stat</span> <span class="nt">-f</span> <span class="s2">"%u"</span> /dev/console<span class="sb">`</span><span class="s2"> -ne 0 ] || [ </span><span class="nv">$TIMEOUT</span><span class="s2"> -eq 0 ]; do
                        sleep 1
                        let TIMEOUT--
                done
                if [ </span><span class="nv">$TIMEOUT</span><span class="s2"> -ne 0 ]; then
                        USER_ID=</span><span class="sb">`</span>/usr/bin/stat <span class="nt">-f</span> <span class="s2">"%u"</span> /dev/console<span class="sb">`</span><span class="s2">
                        GROUP_ID=</span><span class="sb">`</span>/usr/bin/stat <span class="nt">-f</span> <span class="s2">"%g"</span> /dev/console<span class="sb">`</span><span class="s2">
                fi
        else
                USER_ID=</span><span class="sb">`</span>/usr/bin/id <span class="nt">-u</span> <span class="nv">$USERNAME</span><span class="sb">`</span><span class="s2">
                GROUP_ID=</span><span class="sb">`</span>/usr/bin/id <span class="nt">-g</span> <span class="nv">$USERNAME</span><span class="sb">`</span><span class="s2">
        fi
else
        USER_ID=</span><span class="sb">`</span>/usr/bin/stat <span class="nt">-f</span> <span class="s2">"%u"</span> /dev/console<span class="sb">`</span><span class="s2">
        GROUP_ID=</span><span class="sb">`</span>/usr/bin/stat <span class="nt">-f</span> <span class="s2">"%g"</span> /dev/console<span class="sb">`</span><span class="s2">
fi

/usr/local/bin/ntfs-3g </span><span class="se">\</span><span class="s2">
        -o volname="</span><span class="k">${</span><span class="nv">VOLUME_NAME</span><span class="k">}</span><span class="s2">" </span><span class="se">\</span><span class="s2">
        -o local </span><span class="se">\</span><span class="s2">
        -o noappledouble </span><span class="se">\</span><span class="s2">
        -o negative_vncache </span><span class="se">\</span><span class="s2">
        -o auto_xattr </span><span class="se">\</span><span class="s2">
        -o auto_cache </span><span class="se">\</span><span class="s2">
        -o noatime </span><span class="se">\</span><span class="s2">
        -o windows_names </span><span class="se">\</span><span class="s2">
        -o user_xattr </span><span class="se">\</span><span class="s2">
        -o inherit </span><span class="se">\</span><span class="s2">
        -o uid=</span><span class="nv">$USER_ID</span><span class="s2"> </span><span class="se">\</span><span class="s2">
        -o gid=</span><span class="nv">$GROUP_ID</span><span class="s2"> </span><span class="se">\</span><span class="s2">
        -o allow_other </span><span class="se">\</span><span class="s2">
        "</span><span class="nv">$@</span><span class="s2">" &amp;&gt; /var/log/ntfsmnt.log

exit </span><span class="nv">$?</span><span class="s2">;</span></code></pre></figure>

<p>References:</p>

<ol>
  <li><a href="http://psionides.eu/2011/11/20/how-to-fix-ntfs-support-on-osx-lion/">http://psionides.eu/2011/11/20/how-to-fix-ntfs-support-on-osx-lion/</a></li>
  <li><a href="http://fernandoff.posterous.com/ntfs-write-support-on-osx-lion-with-ntfs-3g-f">http://fernandoff.posterous.com/ntfs-write-support-on-osx-lion-with-ntfs-3g-f</a></li>
</ol>]]></content><author><name>Felipe Rezende</name></author><category term="lessons" /><category term="osx" /><category term="tutorial" /><category term="ntfs" /><summary type="html"><![CDATA[HOW TO: NFTS Read and write on Lion/Mountain Lion]]></summary></entry></feed>